
Warning: Attempt to read property "html" on bool in /var/www/wp-content/plugins/blossom-recipe-maker/includes/class-blossom-recipe-hook-functions.php on line 302
Warning: Attempt to read property "thumbnail_url" on bool in /var/www/wp-content/plugins/blossom-recipe-maker/includes/class-blossom-recipe-hook-functions.php on line 303

Yields:
10 Servings
Difficulty: Easy
Prep Time: 30 Mins
This week is all about a little technique tips to make Roses with Fondant. I am talking about American fondant. Here in Australia, people call it either plastic icing or R.T.R. Icing, which means Ready to roll icing. I will take you to a step by step approach make beautiful little roses. You can even do them with the kids or grand kids or get everyone involve in the family and your friends too. With this icing you can create a multitude of flowers and decorate your cakes or desserts. You can do them weeks in advance and store them to dry.
Ingredients
Adjust Servings
-
10 Roses of an average of 5 to 7 petals.
Instructions
-
Getting started with Roses made of fondant icing
-
When you work with Fondant only take out a bit at a time. Fondant icing can dry quickly. So, i recommend you just take a bit at a time or keep it in a zip lock bag. If your fondant has crusted, remove the dry parts and throw it away.
-
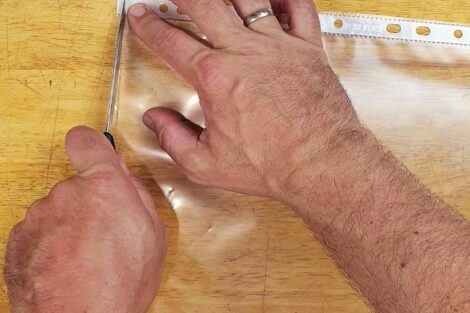
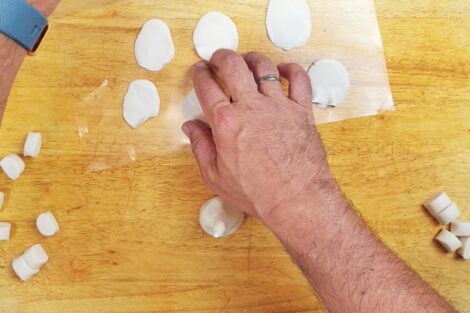
Here i am using a plastic sleeve because its actually easy and you do not need to use cornstarch or icing sugar. With a sharp knife or scissors, cut the bottom part of the sleeve. Try to use a new one it is more hygienic.
-
Do the same for the lengthy part of the sleeve. This will allow to open the sleeve and use it to help you roll out the fondant.

-
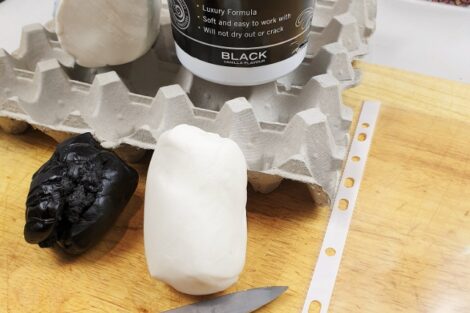
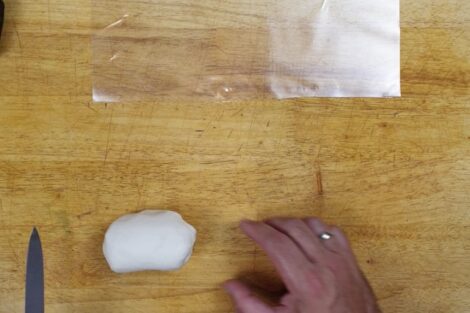
Once done take your fondant icing and with the palm of your hand just soften the paste for a minute. Cut 2/3rd of the fondant for the petals and we will keep 1/3rd of the fondant for the base and core of the roses.
-
Just keep the 1/3rd remaining in the zip lock bad to avoid drying.
-
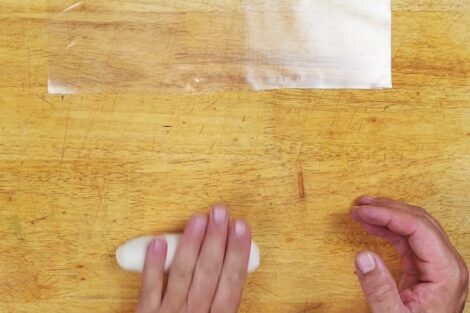
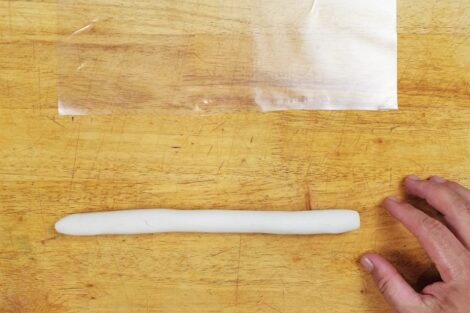
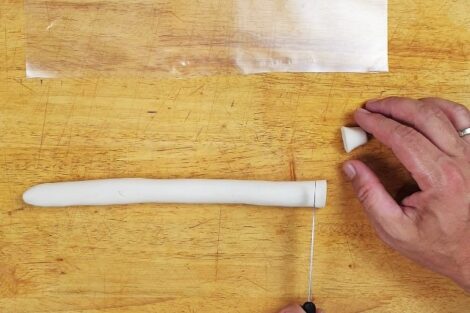
Using your both hands, roll the fondant on the bench or a board until you have a regular 2 cm thick sausage look alike.
-
it is about 20 cm long.
-
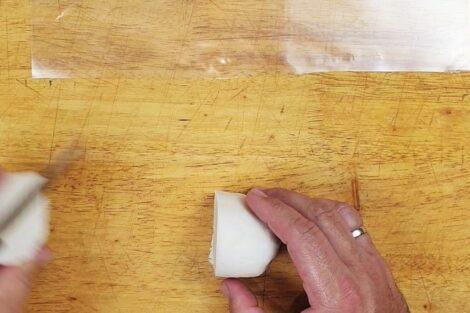
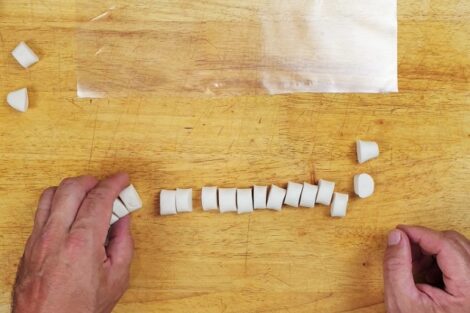
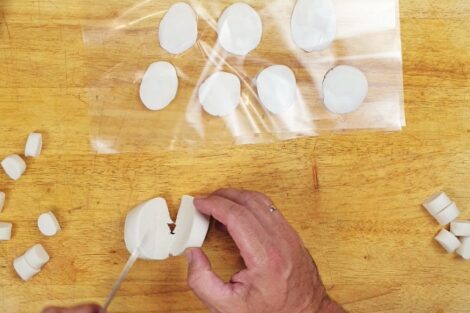
Using the small knife, cut little 1 cm section of the fondant. It does not have to be perfect. Remember this is fun.
-
Open the plastic sleeve.
-
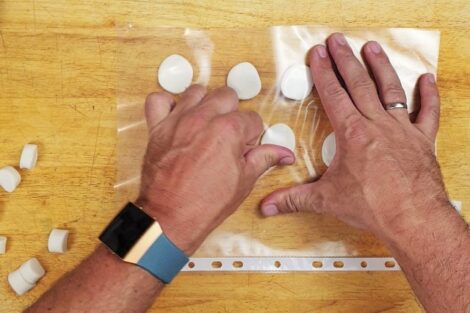
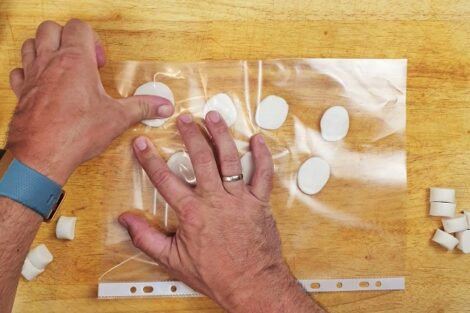
Place about 7 pieces of fondant onto the plastic sleeve.
-
Fold over and cover the fondant with the platisc sleeve.
 Creating the petals
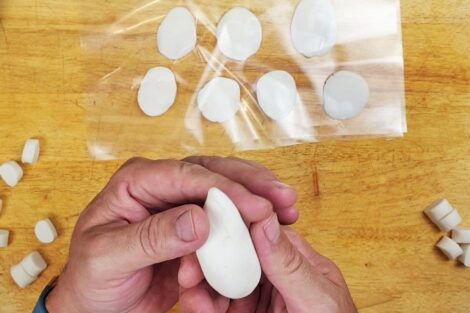
-
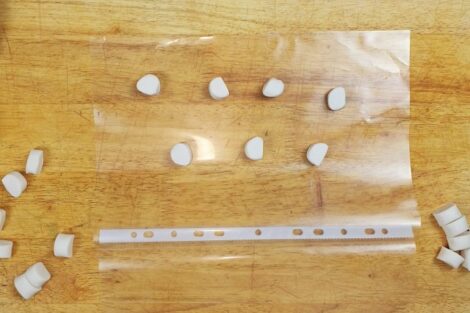
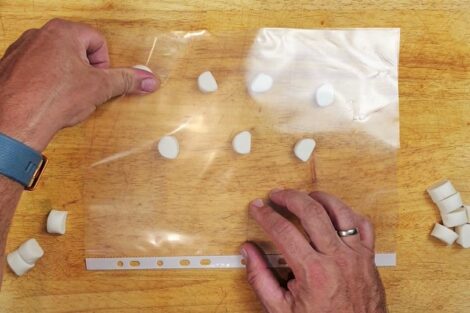
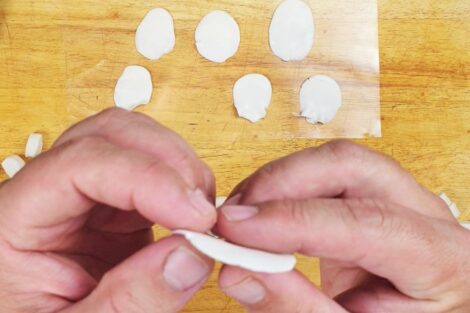
Now, with the help of your thumbs, push away from you the top of the petal. This will enlarge the petal but more so where your really need it. You only need one very thin edge to create nice roses.
-
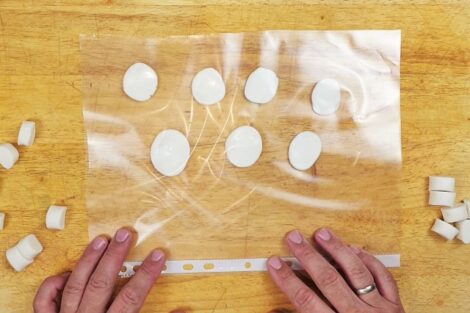
Check it out and keep pushing with your thumbs over the sleeve to get a nice petal. About 4 time the size of the original ball of fondant.
-
Keep doing it until you are satisfied with the size of them.
-
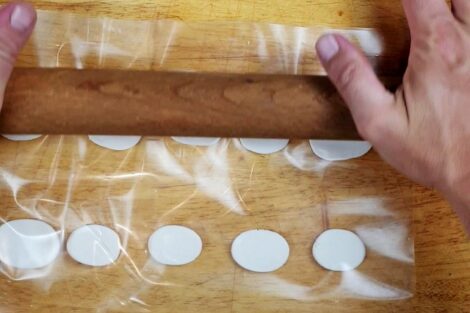
If you find it too difficult, you always have the option to use a rolling pin :).
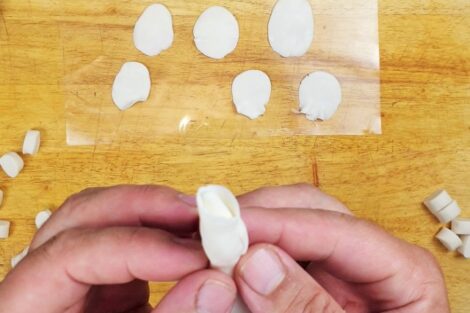
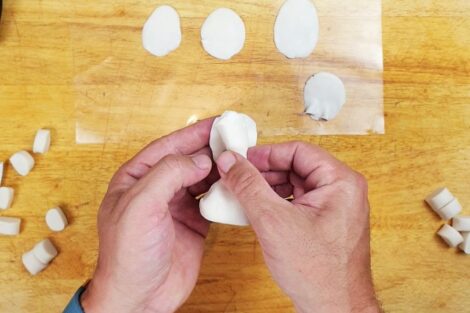
 Making the core of the rose
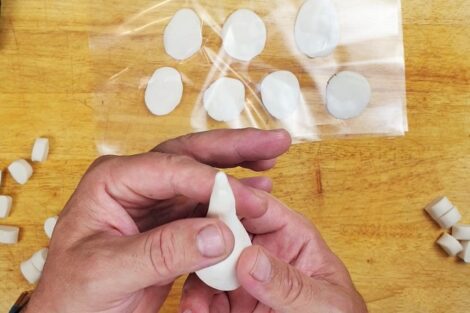
-
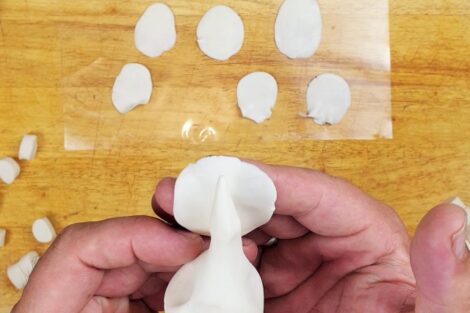
Now that my petals are ready for one rose, i am shaping the remaining 1/3rd of fondant.
-
Here, i am trying to shape a little bulb, a button roses
-
I keep the base nice and thick, shape the bulb where i will start to over the petals one by one.
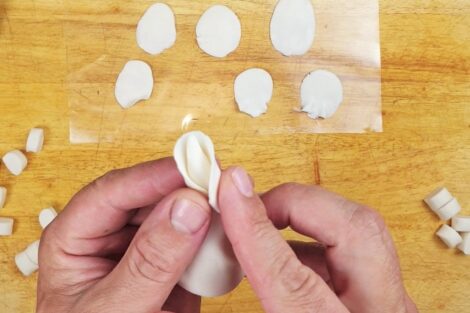
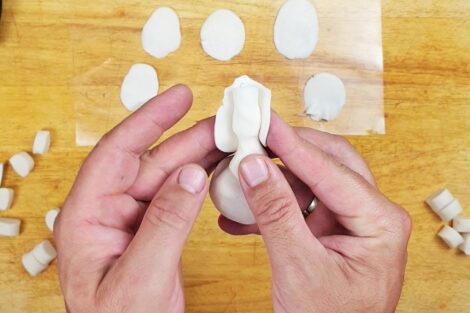
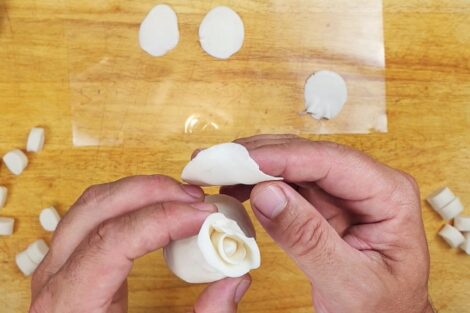
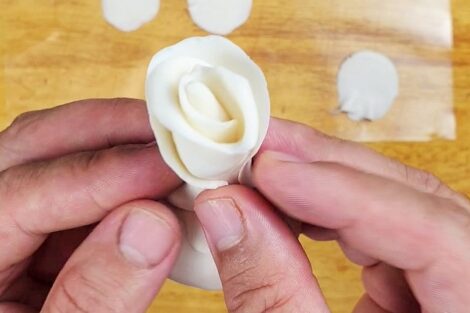
 Building the Rose
-
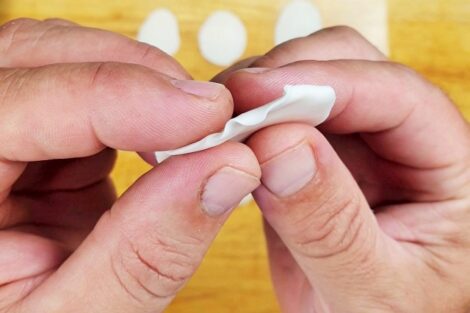
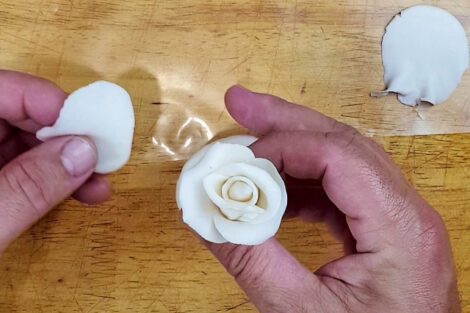
Lifting the plastic sleeve gently, i take my first petal.
-
I check how thin it is. Here it is a little to thick on that size.
-
But paper thin on this size. It is perfect and i will use it to be the top end of my petal.
-
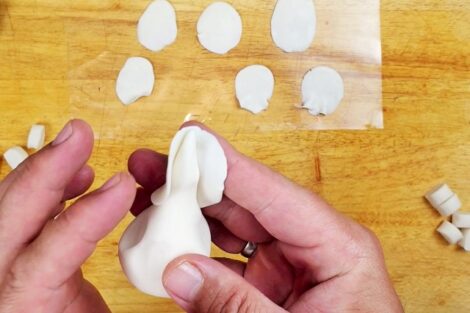
in one hand i grab my base and on the other hand my petal. It is important to have a good start and the only thing you have to focus on, is that the top end of the petal is at the same level (Horizontal with the top of my Bulb. I lay the base on the petal and start to push down the bottom part of the petal to stick to the bulb.
-
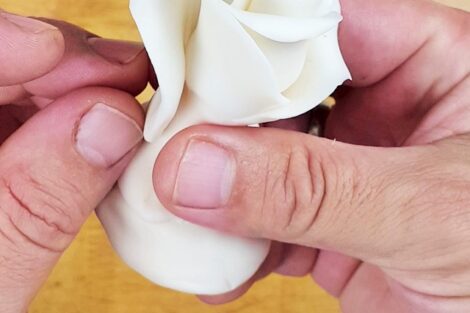
As i push down the bottom part of the petal onto the bulb, i close is gently around the bulb but living it a bit open. This is my personal style .
-
Now, i focus on reshaping my bulb, right at the bottom of the rose.
-
Keep shaping, meaning press gently the petal to the bulb.
-
and voila. a good start.
-
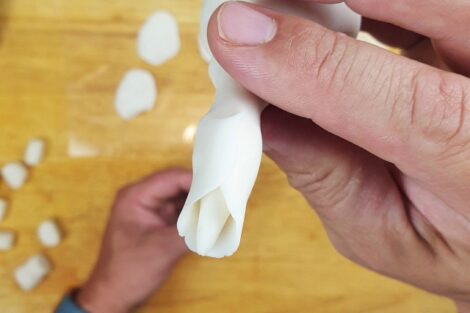
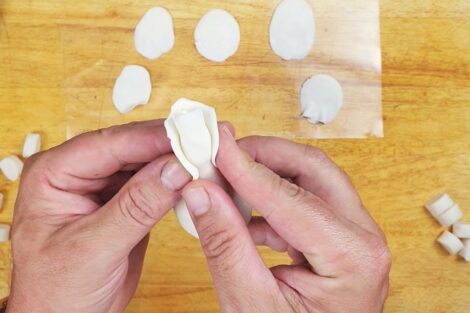
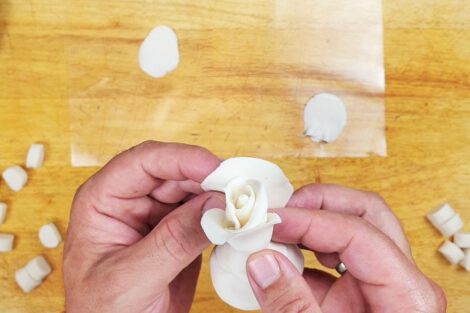
Time for the second petal.
-
Here i repeat exactly what i have done before. I place my petal in the direct opposite way than i did the first one. I make sure my petal align with the top of the rose and start pushing down
-
As i push down i reshape the rose and make the petal stick.
-
Now you can see that the ope part of my first petal is enclose with my second petal and we create another open part for the next petal to lay over.
-
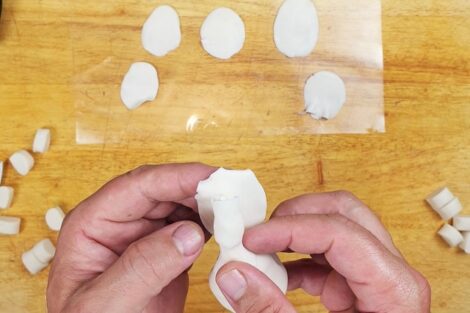
Shape the bottom of the rose.
-
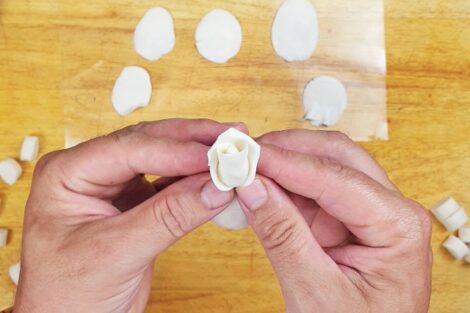
Reach for another petal and repeat exactly what you have done previously.
-
leave a part of the petal a little open for style.
-
Reshape the bottom of the rose.
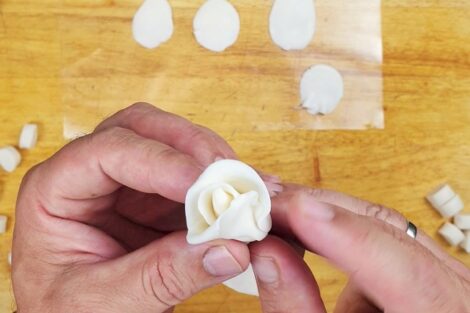
-
Add another petal and do the same.
-
reshape the bottom.
-
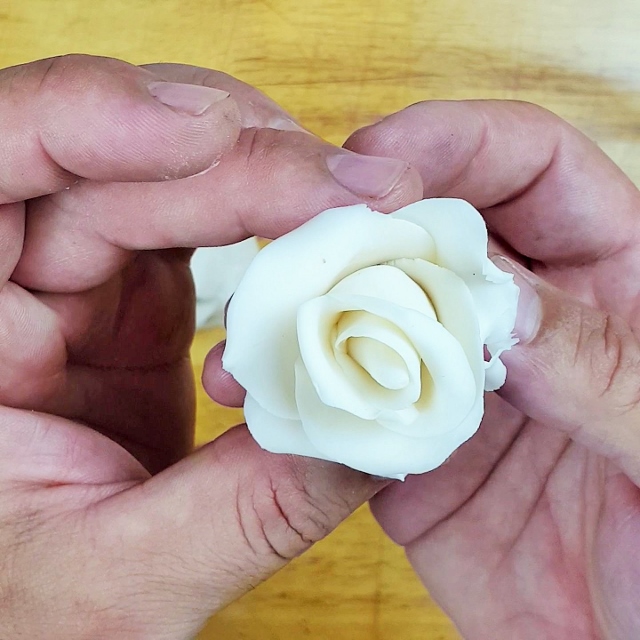
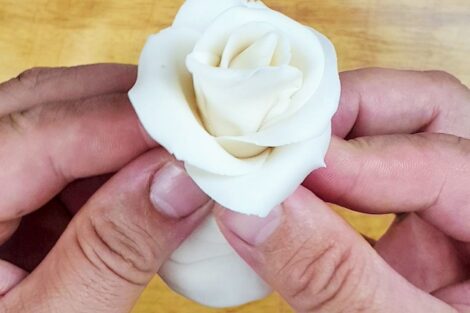
shape your petals to give it a bit more reality eye apeal.
-
Add another petal.
-
Keep going.
-
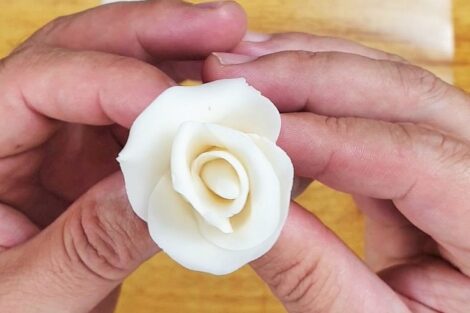
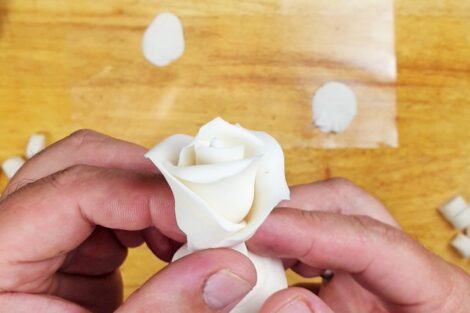
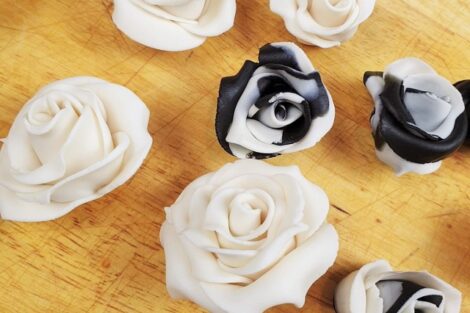
I generally do not make roses with more than 12 petals.
-
Roses made of 7 petals or 5 are my preference.
-
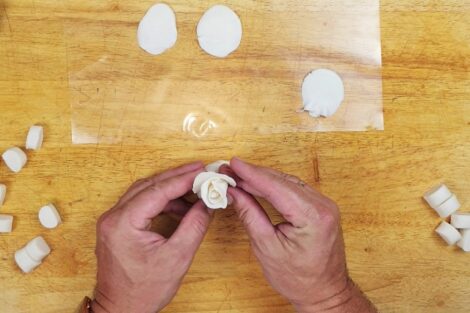
Last petal.
-
reshape and style.
-
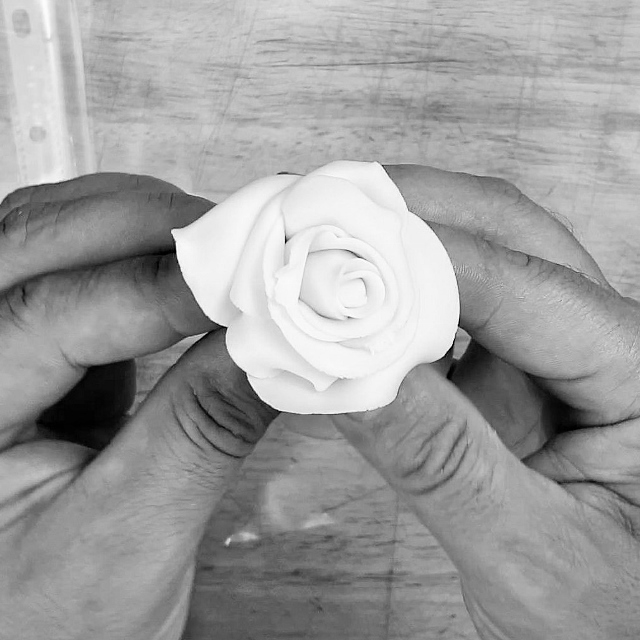
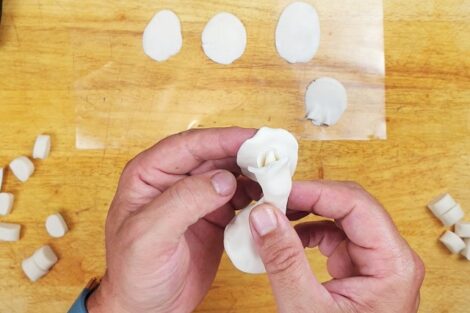
once you are happy with your rose, use a small knife and gently cut at the bottom of the rose.
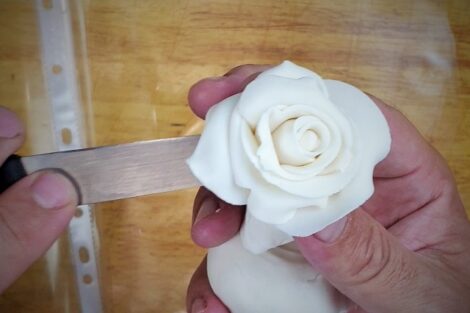
-
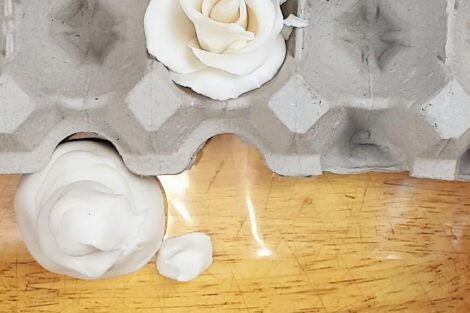
I often uses an egg crate to place my roses to dry off.
-
You can play with multi colour fondant icing. I recommend that you use already made coloured fondant icing if you wish to have a dominant coloured icing. Nowadays, they come in many different tones and strength. For subtle colours or pastels co lours, you can add gel colouring to a white fondant icing.
-
You can keep them for up to 3 to 6 months in a airtight container and dry area. Cake maker or decorator generally makes dozen in advance. You can always adventure and create different flowers. Check my video too for more help. I hope you enjoyed it and have fun with it. Frenchy :)
